
About the Sheet Index

The Sheet Index in Explorer controls sheet numbering and is located in the WorkSet.
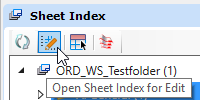
To make changes to the Sheet Index select the second icon: Open Sheet Index for Edit.
Select the top, initial folder of the Sheet Index. Select the third icon, Manage Sheet Index. This opens the dialog below showing the Index settings. The values shown below are good defaults.

From the left side of the dialog, select Folder. These are the default values for all folders created in the future. Set them according to the Division standards (shown in the table below). The screenshot shows the typical values in WFL.

Typical Folder Values
| Value in template WorkSet<div>.dgnws | CFL | EFL | WFL |
|---|---|---|---|
| Number of Digits (* value does not matter for CFL and WFL) | * | 2 | * |
| Automatic Naming of Sheet | < On > | ||
| Inherit Naming Rule from Parent | < Off > | ||
| Show Leading Zero | Off | On | Off |
| Sheet Number Prefix | A | A | A. |

Folders may be added using the fourth icon on the Sheet Index, Create Folder. Make sure the cursor is on the top, initial folder when creating a new top level folder. Folders are created at the current cursor position. When making property changes to folders, do so in the MicroStation Properties dialog. Select the folder, then refer to the Properties dialog - don't use the Manage Sheet Index functionality in the Sheet Index. Be sure to change the Sheet Number Prefix for each folder.
Adding Sheets

During sheet creation, sheets may be placed directly in the Sheet Index by using the Add To Sheet Index button shown below. A dialog will come up to select a destination folder in the Sheet Index. Sheet models can also be dragged to the desired folder in the Sheet Index. Sheets may also be added from the Sheet Index with the fifth icon, Add Sheet.
Sheets can be moved within folders and may be moved between folders in the Sheet Index. The sheet numbers will redefine based on their order in the Sheet Index.
Note: This is an area where FLH has experienced some unexpected results when using the Sheet Index. Try the workflow described, seek assistance if necessary, and reply back if you find other solutions.
Sheet Numbers on Plan Sheets
The FLH sheet borders have the Sheet Number property embedded in the sheet number block. When the Sheet model has been placed in the Sheet Index, the sheet number should update automatically. To set the sheet number it has been found helpful to visit every sheet, ensure that the sheet number shows correctly, then Save Settings. The same process should be done when a change has been made to a sheet in the Sheet Index. Changing from one model to another has helped the sheet numbers to reset. Once it looks correct be sure to Save Settings.
Printing the Plan Set
The plan set can be printed from the Sheet Index. Use the last icon to select Open Print Organizer.
Last updated: Wednesday, March 20, 2024