
Geo-Referenced TIFF
It is possible to create raster files that are geographically orientated or geo-referenced. The geo-referenced file can then be inserted to scale in a MicroStation drawing.
Creating Geo-Referenced TIFF
The following method uses National Geographic's Topo! as the source of the base file.
Locate Area to Be Exported as TIFF
Open National Geographic's Topo! program.
Note: Within WFLHD use the Topo4 Shortcut found at T:\TOPO4!.
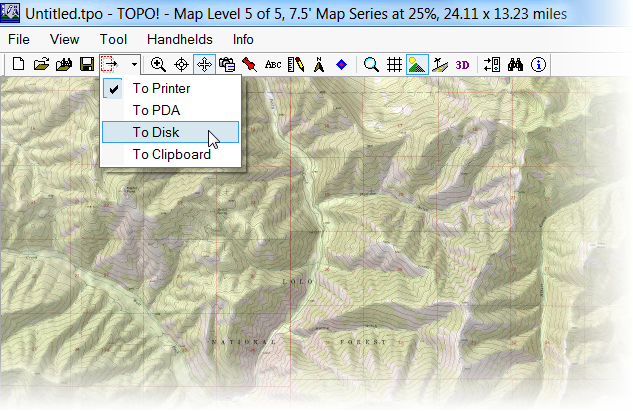
Use the magnifying glass icon to navigate to the desired area.
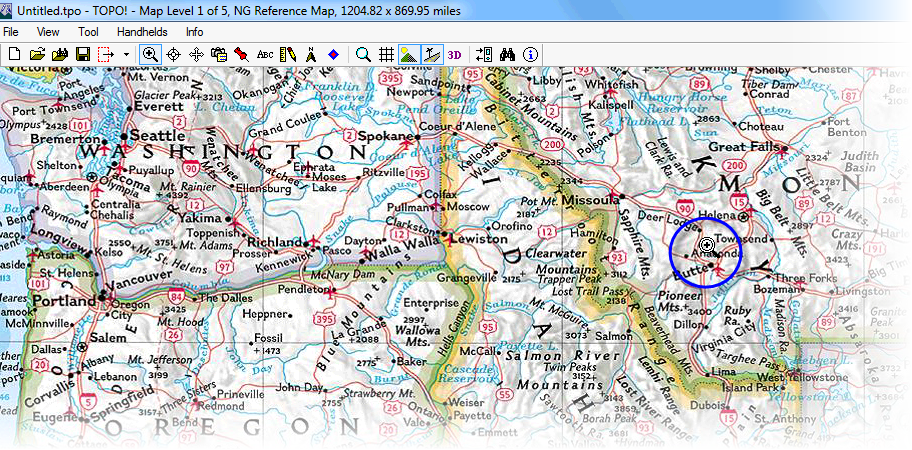
There are five (5) scales of maps to choose from. Continue to use the magnifying glass icon to navigate to level five (5) of the area of interest. Note the title bar indicates map level and scale.

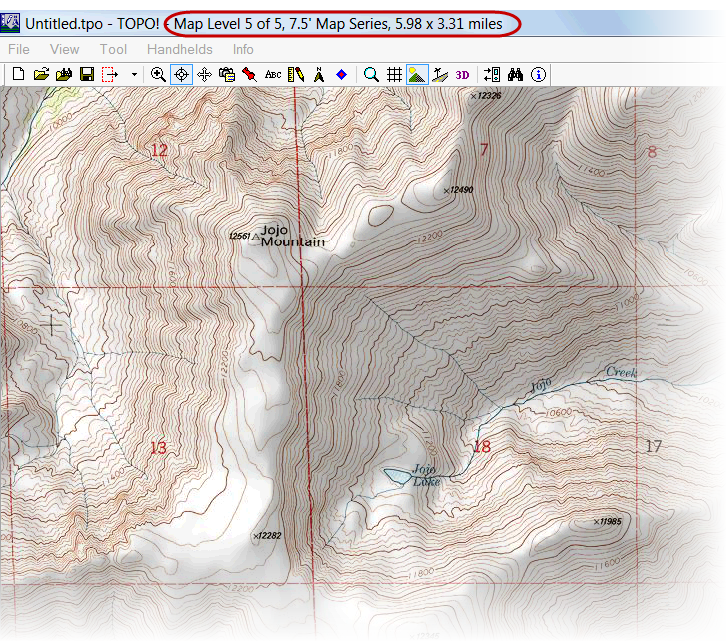
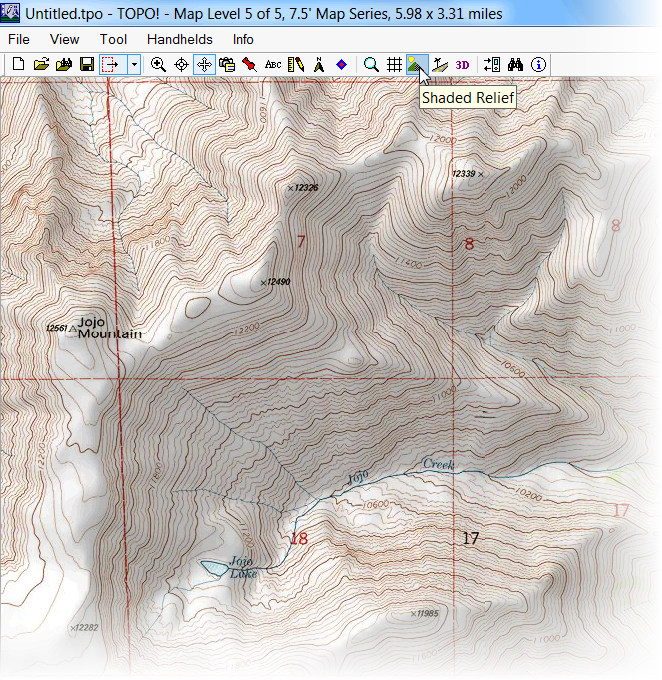
The fifth level is the most popular and finest scaled map and is the 7.5 minute series map. Often referred to as 7 and a half minute quad, published by USGS. An example is shown below.
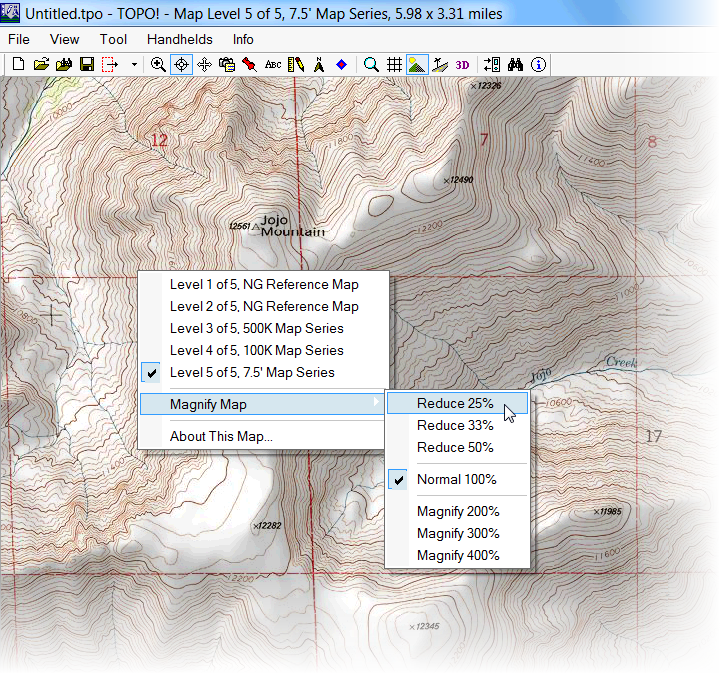
Once on the 7.5' map level, then Right click > Magnify Map > Reduce 25%
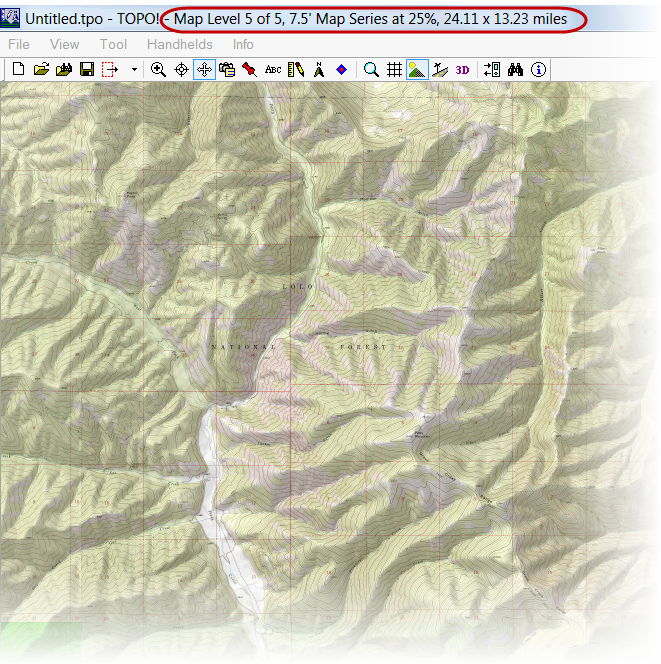
Resulting in in a large area of view at the 7.5' scale. Adjust view area to include all of the area of interest. Note the map series is the same but at a reduced magnification and therefore having a larger coverage area.
Delineate TIFF Area
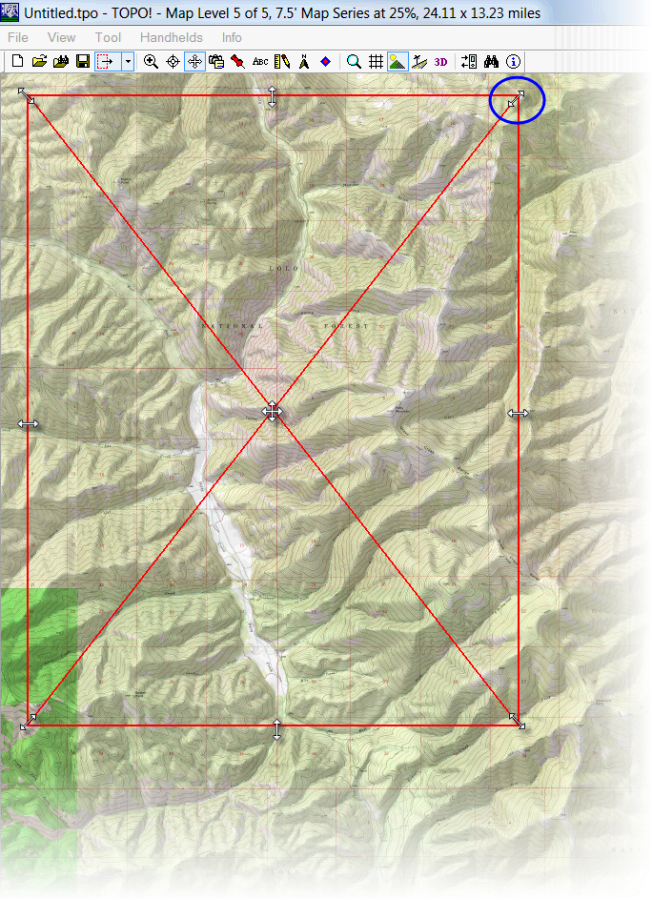
Select Print/Export icon > To Disk
A red boxed area will appear, this defines the clipping extents. Adjust clipping limits by grabbing the corners or sides or move entire box by grabbing the center. Note, all clipping grips are shown below for demonstration only, hover mouse on corners, sides, or center for grips to appear.
IMPORTANT! Magnify back to normal. Right click > Magnify Map > Normal 100%

Export to TIFF
In the Overview area on the far right of the display, under the Disk icon, select the Options tab.
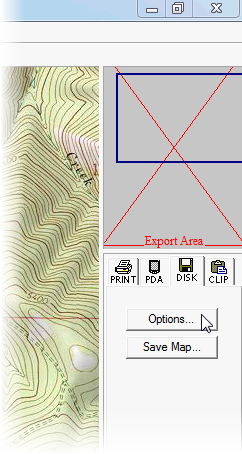
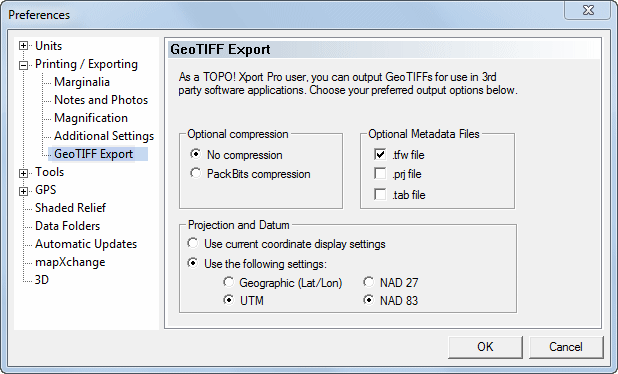
Select Geo TIFF Export leaf under Printing / Exporting. Use the settings below. Select OK
Next select Save Map tab on the Overview area on the right of the display.

Give file a proper name and change type to Geo TIFF w/ TFW
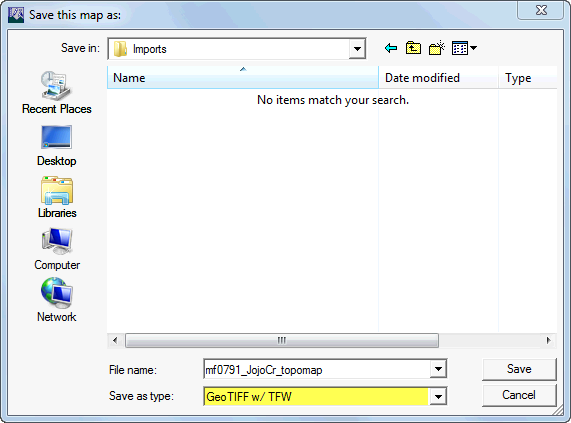
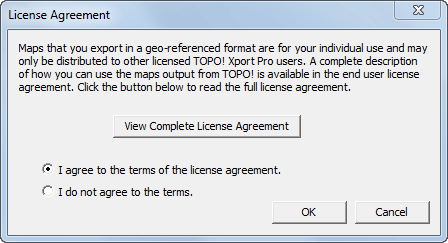
Accept licensing and select OK
File is ready to import as a Geo-raster.
Shaded Relief Option
The map images above shows the shaded relief turned on. It may be beneficial to save a geo-raster map without the shaded relief option.
Shaded relief on
Shaded relief off

Referencing Geo-Referenced TIFF
In MicroStation it is possible to reference raster files that are geographically orientated or geo-referenced. The most common files include Geo-TIFF(.tif with .tfw), Mr. Sid(.sid), and Geo-PDF(.pdf). Some file formats will require a "sister" file. A sister file is sometimes required to establish the geographic position and scale. An example is the .tfw file is a sister file to the .tif file. Some file formats store geographical data within a single file, such as the Mr. Sid and PDF files. GIS type files, such as shape files (.shp), are not raster files and can be imported using the reference menu or preferably using the Bentley Map interface.
Geo-Referenced file types and sister files
| File Name | File Extension | Sister File Extension |
|---|---|---|
| Geo TIFF | .tif | .tfw |
| GeoPDF | None | |
| Mr. SID | .sid | None |
MicroStation Raster Manager Preferences
First configure the MicroStation Preferences to allow easy referencing of raster images. In MicroStation go to File > Settings > User > Preferences... Next, select the Raster Manager category, then Select Default Attributes tab. Next Uncheck all "Use Active:" attributes. Next select Set Defaults... This only needs to be done once for the user profile.

Set Default Attributes according to the settings below. The highlighted settings are critical. Select OK and OK to Preferences menu.
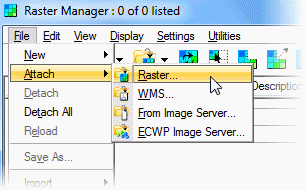
Attach Geo-referenced Raster
Geo-referenced files are attached using the Raster Manager. Open the Raster Manager from the OpenRoads Modeling workflow, Home tab, Primary area, Attach Tools icon. Select Raster Manager from the dropdown menu.

Under the Raster Manger menu, go to File > Attach > Raster
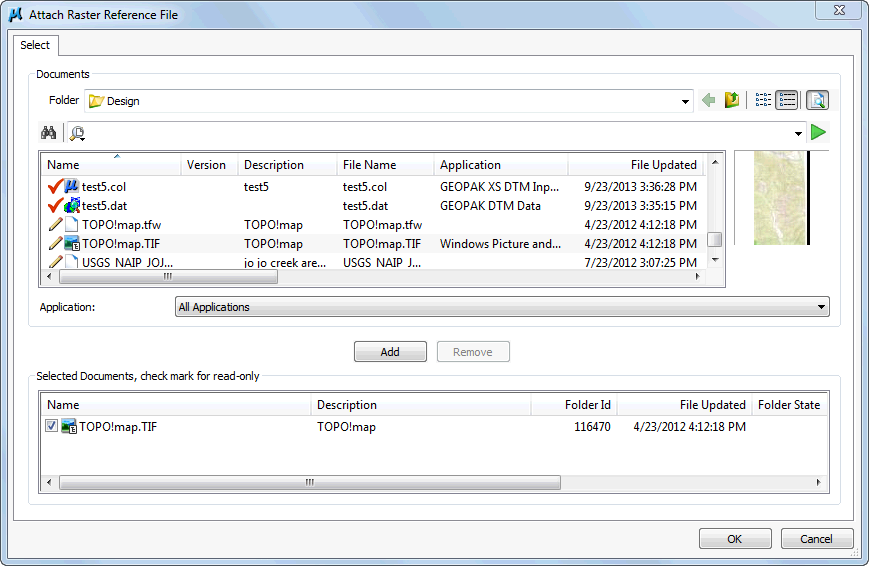
Navigate to the file location and select Geo-referenced raster file from the Attach Raster File menu, select Add, then select OK, No need to select the sister file but reside in the same directory as the raster file. The sister file will have the same name but not the same extension.
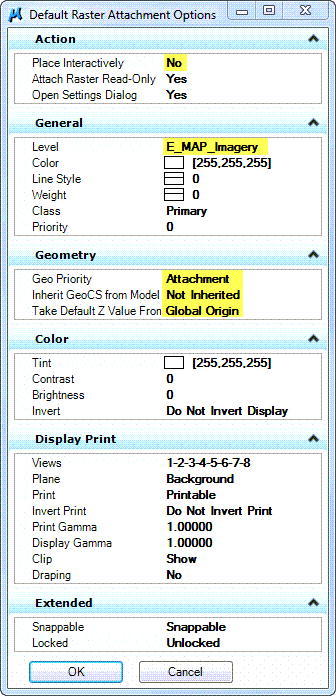
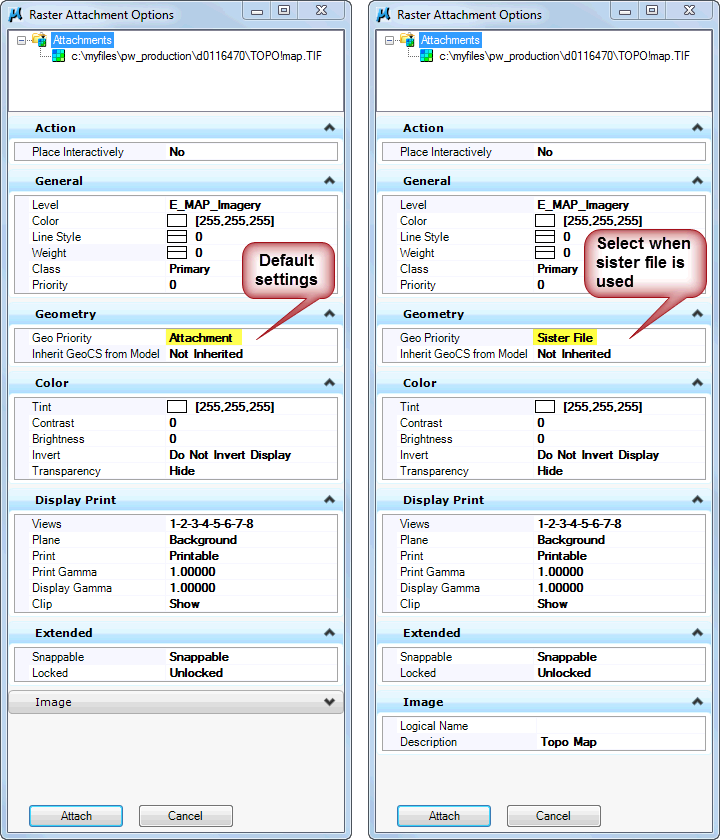
The Raster Attachment Options menu appears. This should reflect preferences made earlier. Settings on the Right shows an exception when attaching a geo-raster with a sister file. Select Sister File for Geo Priority when a sister file exists. Then Select Attach.
The image will show attached on the Raster Manager menu. Note the image was referenced with a GeoCS and details the Geo Priority method. Also note only the parent raster image was attached, not the sister file.
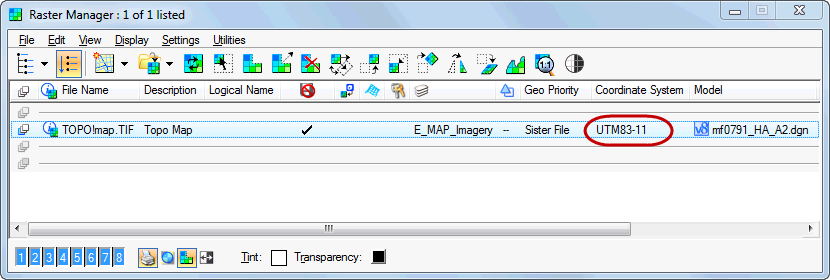
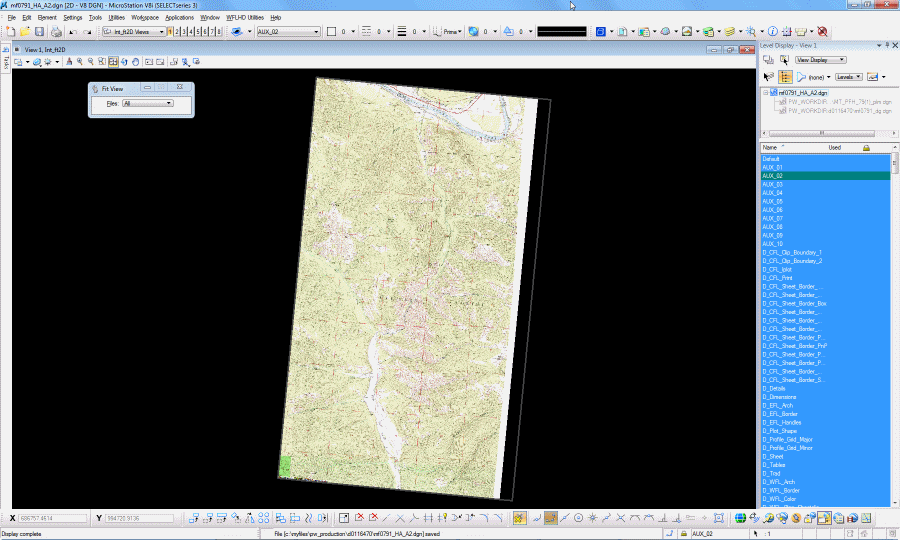
Below is a screen shot of an attached Geo-referenced topographic map. Note the map imagery is to scale and rotated to proper geographical extents.
Last updated: Wednesday, March 20, 2024